Intro
For years, I thought the only options for Plex remote access were the following:
| Option | Pros | Cons |
|---|---|---|
| Port forwarding directly | • Original quality. • Fast. • Free. • Relatively simple to set up. • All types of devices can connect. |
• Extremely insecure. This is presumably how LastPass got hacked. |
| Plex Relay | • Relatively secure, as Plex themselves protect the authentication and broker / proxy the stream. • Very simple set up. • All types of devices can connect. |
• Low quality (1 Mbps free, 2 Mbps paid). • Slow. • Often causes transcoding. |
| Port forwarding via VPS / self-hosted reverse proxy | • More secure than simple port forwarding. • Original quality. • Fast. • All types of devices can connect. |
• Still insecure as it's just port forwarding somewhere else and the security features are probably not great. • Usually paid. • Complex / difficult to set up. |
| VPN | • Very secure (if done properly). • Original quality. • Fast. |
• Complex / diffiicult to set up. • Not all devices will be able to connect (e.g., a TV). |
However, I’ve found a new solution:
| Option | Pros | Cons |
|---|---|---|
| Cloudflare Zero Trust Access Tunnels | • Quite secure, due to tunnel-based reverse proxy, Web Application Firewall (WAF) with Managed Ruleset which can be upgraded, bot mitigation, anti-DDoS, etc. • Original quality. • Fast. • Free. • All types of devices can connect. |
• Still not risk-free, as your Plex server could still be discovered (although more difficult) and Cloudflare's defenses could be bypassed. • Somewhat complex / difficult to set up (which this guide resolves). • Cloudflare inspect the HTTPS traffic. • Requires Cloudflare be authoritative for your custom domain's DNS (which is often not a problem, and it's not the same as transferring the domain registration). |
In this how-to, I will be covering how to set this up using Cloudflare’s free plan and non-containerised Plex on Windows, but the steps should be broadly applicable for any given OS and deployment.
With this new solution, the networking ends up looking like this:
Index
Overview of and links to sections:
Changelog
2026/01/18:
Reflected renaming of "Website" to "Domain", "WAF" to "Security rules", "Tunnel" to "Connector", "Public Hostname" to "Published application route", and "Access" to "Access controls".
Removed "Security Level", as it’s no longer configurable.
Removed WAF / security rule for threat score, as per https://blog.cloudflare.com/enhanced-security-and-simplified-controls-with-automated-botnet-protection/. Thanks, nicmart84!
Added "Block AI bots".
Updated location of "Bot Fight Mode".
Updated location of "Notifications".
2025/09/19:
Added fix for off-LAN iOS downloads getting stuck. Thanks, /u/tha_passi!
Corrected cache rule. Thanks, Badaboing!
2025/08/15: Added section for known issues.
2025/05/17: Slight tweaks, mostly to improve readability.
2025/03/15: Expanded guide for disable caching to include an additional step which prevents issues with Direct Play in the iOS native app when accessing externally. Thanks, hrz!
2024/09/22: Updated tunnel instructions and screenshots, following Cloudflare moving these from “Access” to “Networks”.
Cloudflare disclaimers
Before we get started on the technical how-to, there are a few things that you should be aware of.
Terms of Service (ToS)
If you Google this service and use case, you’ll find a lot of old posts about how it’s against the ToS. However, on 2023/05/16, Cloudflare posted “Goodbye, section 2.8 and hello to Cloudflare’s new terms of service”, and my takeaways of it are as follows:
The problematic excerpt from the general ToS (see below) was only ever intended to apply to their Content Delivery Network (CDN) service, so it has been moved to the CDN-specific ToS.
Use of the Services for serving video or a disproportionate percentage of pictures, audio files, or other non-HTML content is prohibited
The Zero Trust service (which covers Access and its tunnels) seems to be separate to the CDN service, as can be seen in Cloudflare’s own screenshot:
Neither the general, Self-Serve Subscription Agreement nor the Zero Trust-specific Terms of Service seem to state anything even remotely similar to the above.
It is possible that Zero Trust Access Tunnels makes use of their CDN, but I have yet to find any definitive evidence of this. In fact, to the contrary:
Cloudflare’s own definition of a CDN is “a geographically distributed group of servers that caches content close to end users”, which we won’t be doing.
“Why Cloudflare?“ lists “SASE and SSE” (Zero Trust) and “Fast app delivery and network infrastructure“ (CDN) as separate use cases.
“Cloudflare Tunnel • Cloudflare Zero Trust docs” → “Evolving to a SASE architecture with Cloudflare”:
Says “Cloudflare One is a secure access service edge (SASE) platform”. “Solution Brief: Cloudflare One” → section “How Cloudflare One works” doesn’t mention their CDN service at all.
Says “Blog: Zero Trust, SASE, and SSE: foundational concepts for your next-generation network”, which says:
“Cloudflare One includes a ZTNA solution, Cloudflare Access, which operates in client-based or clientless modes to grant access to self-hosted and SaaS applications.”
“Cloudflare One includes Cloudflare Tunnel. Users can install a lightweight daemon that creates an encrypted tunnel between their origin web server and Cloudflare’s nearest data center without opening any public inbound ports.”
“Cloudflare One is built on Cloudflare’s global network, which spans over 270 cities in over 100 countries, 10,500+ interconnected networks, and 140+ Tbps capacity.”
Says “Cloudflare’s connectivity cloud also offers many other services that improve application performance and security, such as API Gateway, Web Application Firewall, Content Delivery, or DDoS mitigation, all of which can complement an organization’s SASE architecture. For example, our Content Delivery Network (CDN) features can be used to improve the performance of a self hosted company intranet. Cloudflare’s full range of services are illustrated below.”
Says “Connectivity to self-hosted applications is facilitated through tunnels that are created and maintained by a software connector, cloudflared. Cloudflared is a lightweight daemon installed in an organizations’ infrastructure that creates a tunnel via an outbound connection to Cloudflare’s global network.”
Says “Applications exposed this way receive all of the benefits of Cloudflare’s leading DNS, CDN, and DDoS services as well as our web application firewall (WAF), API, and bot services, all without exposing application servers directly to the Internet.”
Of the 11 network diagrams that specifically mention Cloudflare services, only 2 reference the CDN, and even then it’s just inside the Anycast network alongside ZTNA and other services.
“Cloudflare CDN Reference Architecture“:
Figure 3 shows the CDN service running alongside the DNS, DDoS, and WAF services inside the Cloudflare Global Anycast Network.
Says “The Cloudflare CDN leverages the Cloudflare global Anycast network”.
Says “Edge nodes within the Cloudflare network cache content from the origin server and are able to respond to requests via a cached copy. Cloudflare also provides DNS, DDoS protection, WAF, and other performance, reliability, and security services using the same edge architecture.”
“Once a site is onboarded, standard caching is configured by default.”
My takeaway of all of this is that Zero Trust and CDN share the same infrastructure - the Global Anycast Network - but are separate services, rather than Zero Trust being built on top of the CDN.
However, people have reported (separately from this) that, even since the ToS change, Cloudflare have banned them for using this type of set up.
Also, “How Cloudflare erroneously throttled a customer’s web traffic” (posted before the ToS change) says:
In addition to the purported bans, Cloudflare also throttle bandwidth between them and the origin server if they believe that the customer is breaching the ToS.
“Cloudflare does not have an established process to throttle customers that consume large amounts of bandwidth, and does not intend to have one.”
“Any action taken against a customer domain, paying or not, will require multiple levels of approval and clear communication to the customer.”
So, you should look into this for yourself and come to your own informed decision.
Cost
You may be suspicious how / why Cloudflare offer unlimited bandwidth, sophisticated security controls, advanced connectivity, etc for free. Refer to what their CEO states at https://www.cloudflare.com/en-gb/plans/free/ → https://webmasters.stackexchange.com/questions/88659/how-can-cloudflare-offer-a-free-cdn-with-unlimited-bandwidth.
TL;DR: It’s free advertising for them and helps them make their services better for their paying customers.
HTTPS and privacy
It seems that Cloudflare always intercept / inspect / terminate / decrypt inbound HTTPS connections, and there’s nothing that can be done about it. So, be aware that they can see the URLs and content passing through their network. However, they seem to have a relatively good stance on privacy judging by https://blog.cloudflare.com/certifying-our-commitment-to-your-right-to-information-privacy/.
Process
This process will be an adapted version of https://developers.cloudflare.com/cloudflare-one/connections/connect-networks/get-started/.
Prerequisites
To complete this guide, you:
Will need to own a web domain registration, but this is pretty easy and cheap.
May need to be comfortable with DNS and nameserver migrations, depending on whether you have subdomains. (Although, if you have subdomains, you will probably be comfortable with this anyway.)
Step 1: Set up Cloudflare account
Create your accounts at https://dash.cloudflare.com/sign-up (core) and then https://one.dash.cloudflare.com/ (Zero Trust) using the free plan.
Step 2: Migrate DNS to Cloudflare
This is required because https://developers.cloudflare.com/fundamentals/setup/account-setup/add-site/ → https://developers.cloudflare.com/dns/zone-setups/partial-setup/ says - and testing confirmed - that what they call a “partial setup” (retaining your existing authoritative name servers and only using Cloudflare for subdomains) is not available on the free plans.
To do this:
1. At https://dash.cloudflare.com/ → “Domains”, click on “Onboard a domain”.
2. Enter your domain name.


3. Select the free plan.
4. Double check Cloudflare’s automatic import of DNS records against your authoritative name servers and ensure that you recreate any missing ones, as any given service is only able to do so automatically for default / common ones, as illustrated below.


5. Make a note of your assigned Cloudflare name servers.
6. In your registrar account (e.g., Enom, GoDaddy, 123 Reg), change your domain’s name server records. Be aware that this can take up to a few days to propagate around the Internet and take affect, but in practice it usually only takes 15 minutes to an hour or so. The following example is using Namecheap:


7. Back in Cloudflare, wait for it to verify the name server change, or force a check.


8. At https://dash.cloudflare.com/ → “Domains”, eventually your domain name / website’s status should change from “Pending Nameserver Update” to “Active“.

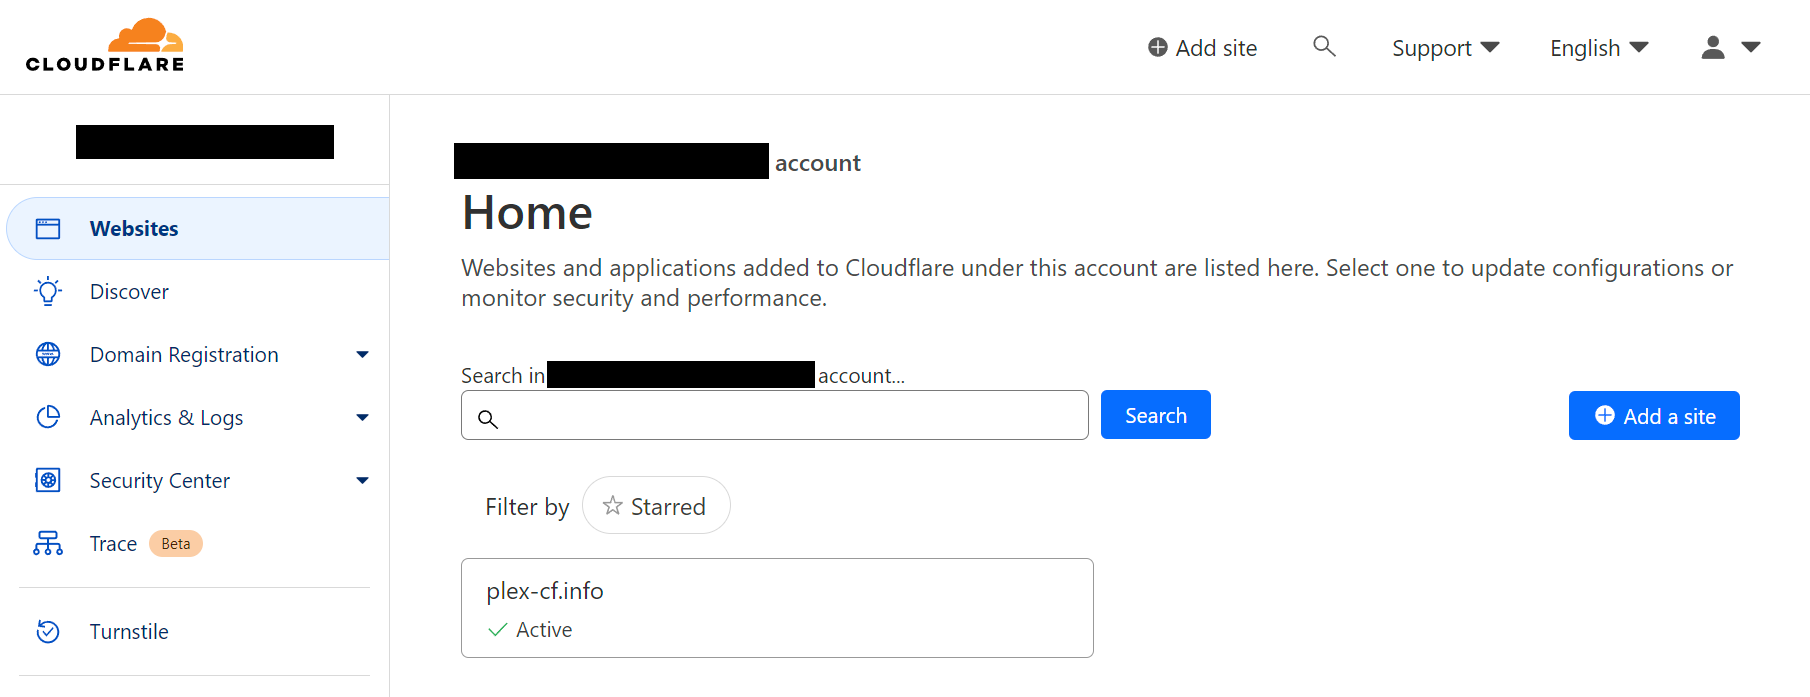
You should also receive an email notification:
Step 3: Disable caching
We’ll disable Cloudflare’s caching for the website so that the content should always retrieved from your (origin) server in order to mitigate (1) any unintentional costs or issues and (2) usage of the CDN (according to at least https://community.cloudflare.com/t/can-i-disable-cdn/10892/2 and https://community.cloudflare.com/t/how-can-we-disable-cdn-caching-completly-and-use-only-dns-and-waf/376177/2).
1. Browse to https://dash.cloudflare.com/ and select “Domains” → your domain name → “Caching”.
2. For “Configuration”:
Set “Caching Level” to “No query string”. (This fixes an issue where seeking fails when using Direct Play in the iOS apps on external Wi-Fi - thanks to @hrz in the comments.)
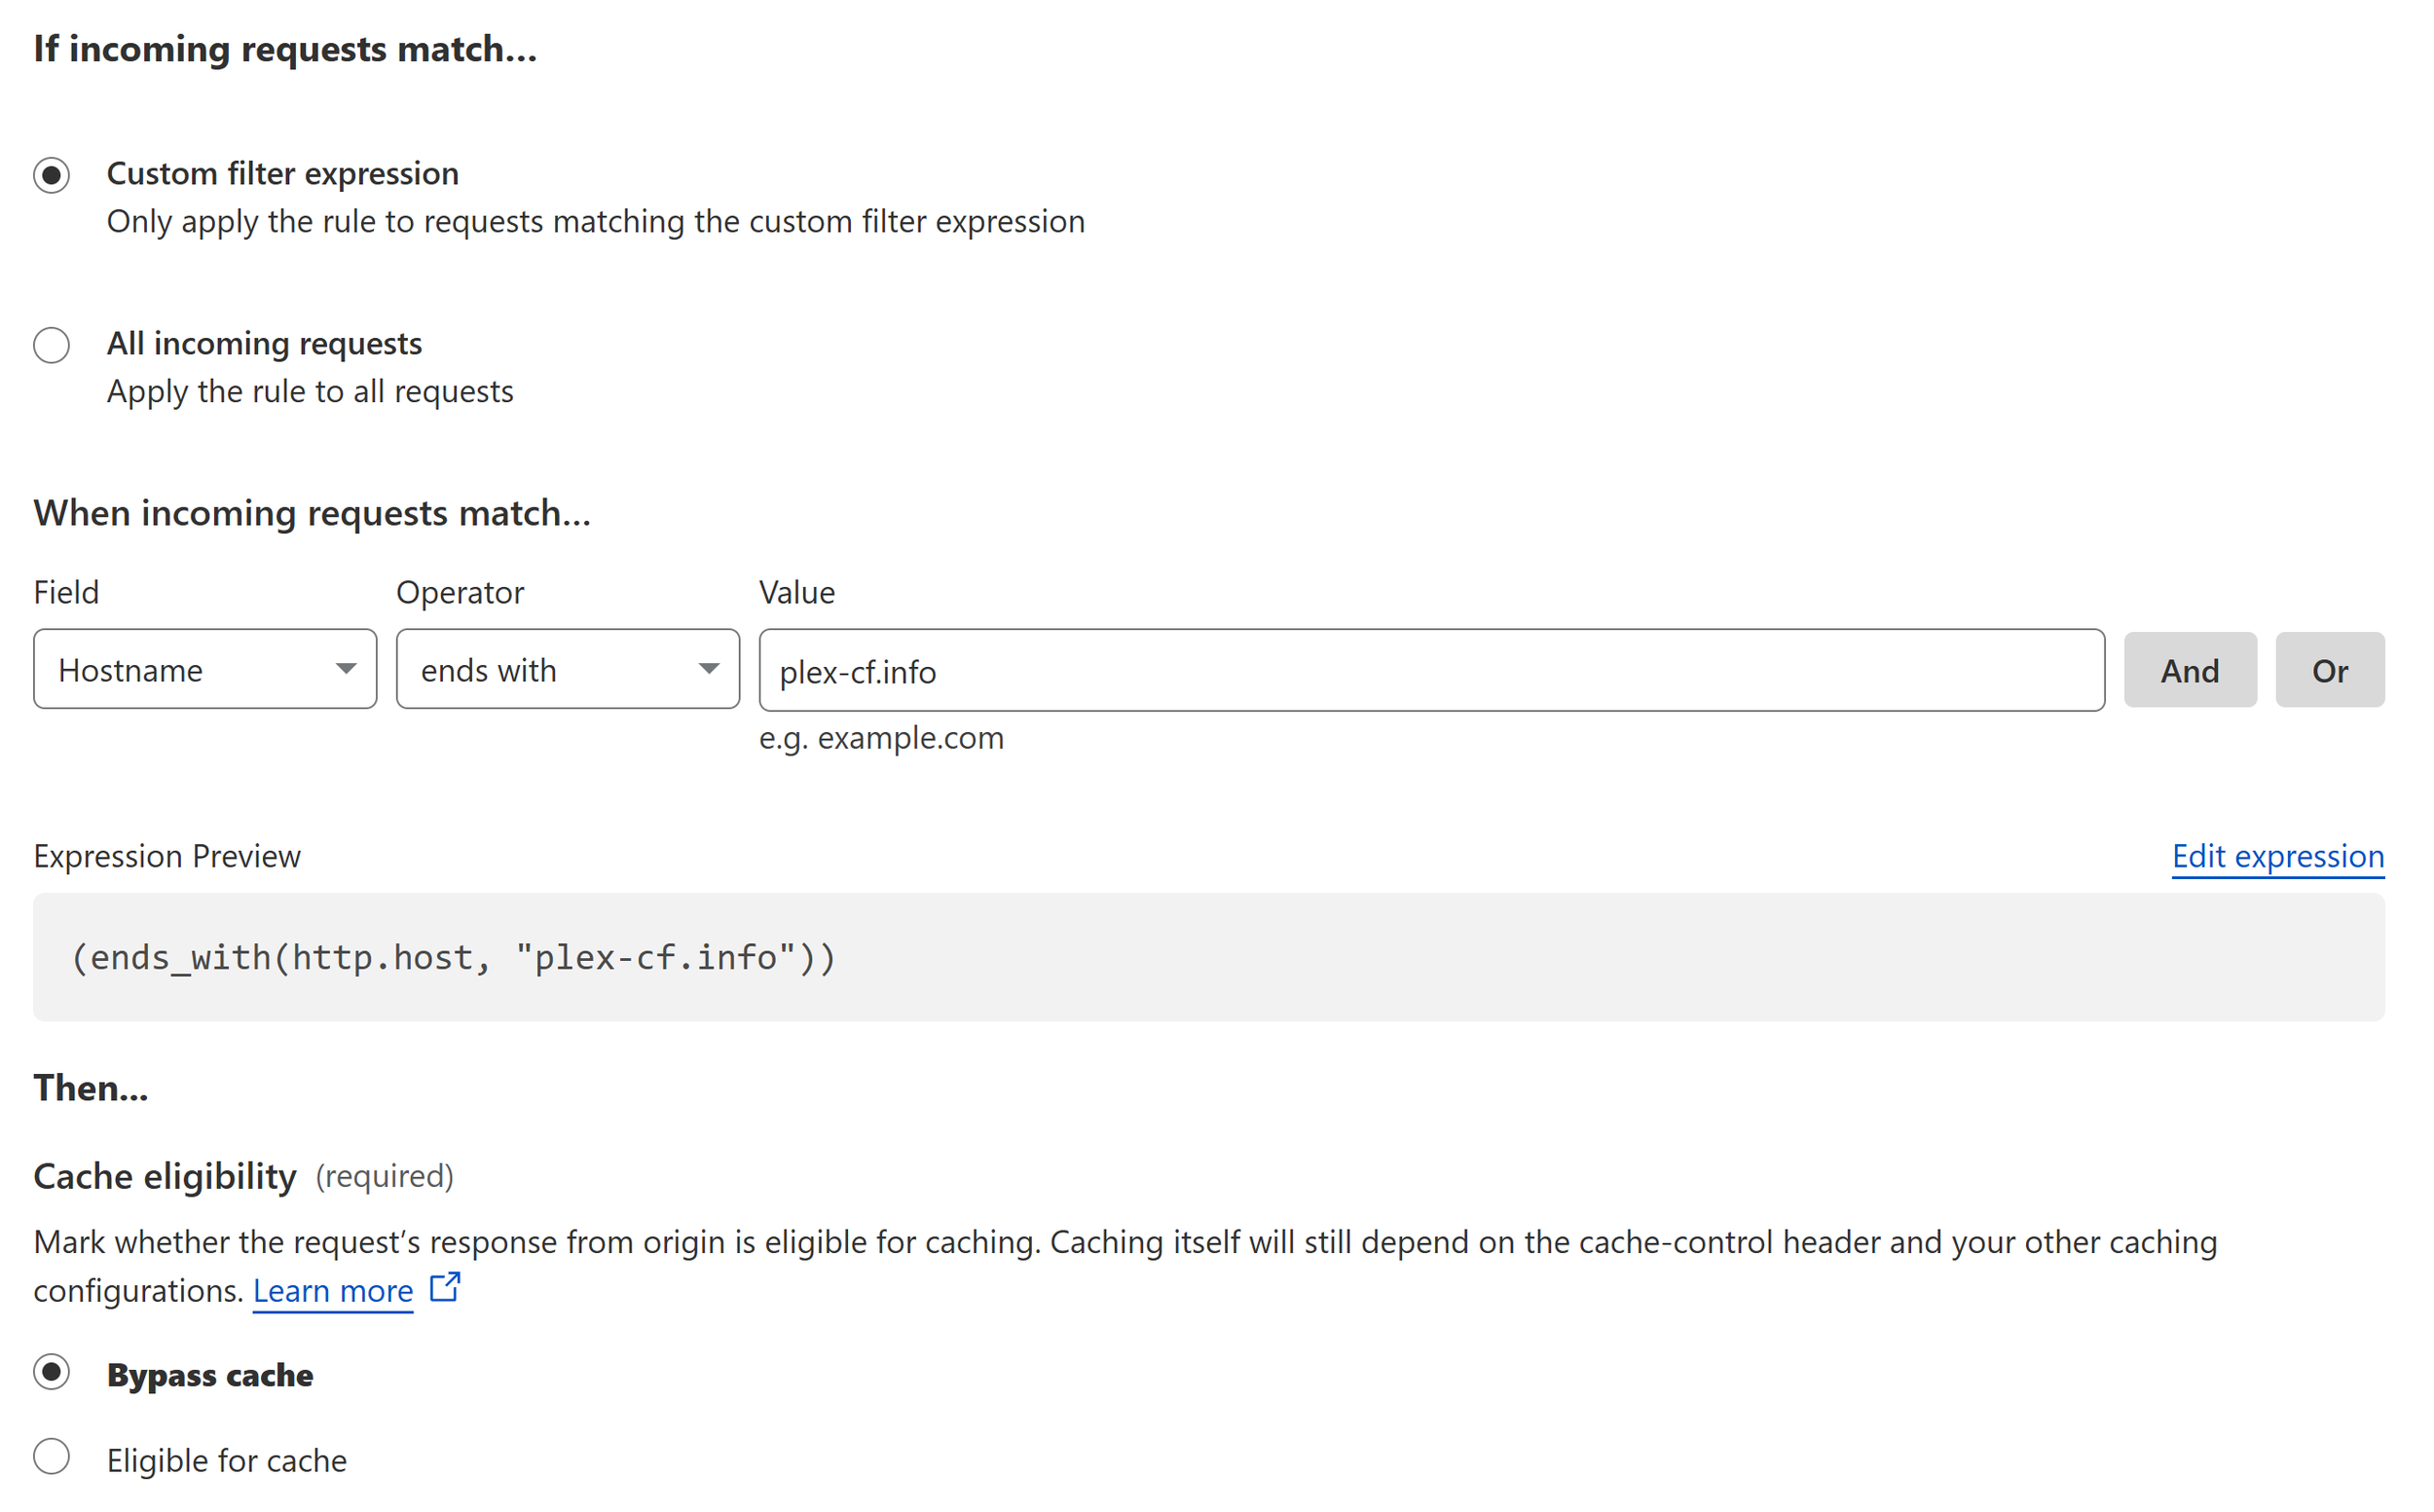
3. For “Cache Rules”:
Click on “Create rule”.
Set the options as follows:
Rule name: “Disable caching” or something.
When incoming requests match…
Field: “Hostname”.
Operator: “ends with”.
Value: Your domain name (e.g., “plex-cf.info“).
Cache eligibility: “Bypass cache”.
Click on “Deploy”.


This can be validated as working at https://dash.cloudflare.com/ → “Domains” → your domain name → “Analytics & Logs” → “HTTP Traffic”.
Step 4: Set up tunnel
1. Browse to https://one.dash.cloudflare.com/ → your account → “Networks” → “Connectors”.
2. Click on “Create a tunnel”.
3. Select the tunnel type “Cloudflared”.
4. Set a tunnel name. A tunnel can handle multiple services, so you can just use your server’s hostname. This can be changed later anyway.
5. Choose your Operating System and architecture. I will be using Windows as an example.

6. Follow the instructions. Some notes:
I was surprised to find that their installer isn’t digitally code signed, but it seems to be expected. To somewhat make up for this, you can calculate the SHA-256 hash (PowerShell command
Get-FileHash -Algorithm SHA256 -Path "<path to installer file>") and compare it to the one listed at https://github.com/cloudflare/cloudflared/releases.The installer only has a brief pop-up progress window - when it’s complete, its window automatically closes, so if you can’t see it then assume it’s done.
The command is what installs the automatic background service
cloudflared agent.
![2024 ∕ 01 ∕ 07 19꞉35꞉00 - Windows_11_[Running]_-_Oracle_VM_Virtual.png](https://images.squarespace-cdn.com/content/v1/55ca1042e4b07aa63f079ba0/1704656308237-24FAWTVSPXXWNWJ9NOND/2024%E2%80%89%E2%88%95%E2%80%8901%E2%80%89%E2%88%95%E2%80%8907+19%EA%9E%8935%EA%9E%8900+-+Windows_11_%5BRunning%5D_-_Oracle_VM_Virtual.png)
![2024 ∕ 01 ∕ 12 18꞉53꞉27 - Windows_11_[Running]_-_Orac.png](https://images.squarespace-cdn.com/content/v1/55ca1042e4b07aa63f079ba0/1705085629957-NB538E0HBQHH28YTXTI9/2024%E2%80%89%E2%88%95%E2%80%8901%E2%80%89%E2%88%95%E2%80%8912+18%EA%9E%8953%EA%9E%8927+-+Windows_11_%5BRunning%5D_-_Orac.png)
![2024 ∕ 01 ∕ 07 19꞉37꞉16 - Windows_11_[Running]_-_Oracle_VM_Virtual.png](https://images.squarespace-cdn.com/content/v1/55ca1042e4b07aa63f079ba0/1704656310826-YOQXGPOT6J88XDATRGT7/2024%E2%80%89%E2%88%95%E2%80%8901%E2%80%89%E2%88%95%E2%80%8907+19%EA%9E%8937%EA%9E%8916+-+Windows_11_%5BRunning%5D_-_Oracle_VM_Virtual.png)
![2024 ∕ 01 ∕ 07 19꞉37꞉46 - Windows_11_[Running]_-_Oracle_VM_Virtual.png](https://images.squarespace-cdn.com/content/v1/55ca1042e4b07aa63f079ba0/1704656313457-FVRRDDYC3V3953O8RXS3/2024%E2%80%89%E2%88%95%E2%80%8901%E2%80%89%E2%88%95%E2%80%8907+19%EA%9E%8937%EA%9E%8946+-+Windows_11_%5BRunning%5D_-_Oracle_VM_Virtual.png)
7. Browse to https://one.dash.cloudflare.com/ → your account → “Networks” → “Tunnels”. Your new tunnel should be reporting as healthy.
Step 5: Set up public hostname
1. Browse to https://one.dash.cloudflare.com/ → your account → “Networks” → “Connectors”.
2. Click on the 3 vertical dots → “Configure”.

3. Click on “Published application routes” → “Add a published application route”.
4. Set the options as follows:
Public hostname:
Subdomain: I’d recommend a random value (e.g., “storeroom-parachute“). This is not user-facing / visible, and doing so should minimise the chances of discovery via scanning, in combination with HTTP’s name-based virtual hosting and HTTPS’ / TLS’ Server Name Indication (SNI).
Domain: Your domain (e.g., “plex-cf.info“).
Path: Blank.
Service:
Type: “HTTPS”.
URL: “localhost:32400“. Change the number if you’ve customised your Plex Media Server port from the default. (Don’t worry about this being routable or not - the traffic only has to “route” locally within the server as it exits the tunnel.)
Additional Application Settings → TLS:
No TLS Verify: “Enabled”. There’s little point in setting this up in this case, as the traffic egresses the tunnel directly onto the server. In fact, setting up “proper” (publicly trusted) HTTPS for Plex itself can actually be counter productive in that, if you use the same FQDN, Certificate Transparency logs will leak your FQDN to the public. This isn’t a problem with this service as it issues wildcard certificates. (I know subdomains aren’t really private.)
As Cloudflare provides the authoritative name servers, this step also automatically creates the required DNS record:
Step 6: Check URL
Browse to your URL. It should load your Plex server’s media successfully and securely.
![2024 ∕ 01 ∕ 07 20꞉08꞉32 - Windows_11_[Running]_-_Oracle_VM_Virtual.png](https://images.squarespace-cdn.com/content/v1/55ca1042e4b07aa63f079ba0/1704750010872-8QTDA7Z38MP09302IWA1/2024%E2%80%89%E2%88%95%E2%80%8901%E2%80%89%E2%88%95%E2%80%8907+20%EA%9E%8908%EA%9E%8932+-+Windows_11_%5BRunning%5D_-_Oracle_VM_Virtual.png)
![2024 ∕ 01 ∕ 08 21꞉39꞉01 - Windows_11_Home_[Running]_-_Orac.png](https://images.squarespace-cdn.com/content/v1/55ca1042e4b07aa63f079ba0/1704750031953-9AZQEHSTWA8DOB64BHPZ/2024%E2%80%89%E2%88%95%E2%80%8901%E2%80%89%E2%88%95%E2%80%8908+21%EA%9E%8939%EA%9E%8901+-+Windows_11_Home_%5BRunning%5D_-_Orac.png)
Step 7: Set Plex custom server access URL
At this stage of the process, https://app.plex.tv/ and the apps won’t be able to connect via Cloudflare because Plex is unaware of the new setup as we’re not using its Remote Access feature and we haven’t set up a forward proxy on the server.
To fix this:
1. On your Plex server, access the interface via https://localhost:32400/ or the new URL.
2. Browse to “Settings” → “Network”.
3. If needed, click on “Show Advanced“.
4. Scroll down and, in “Custom server access URLs”, enter your new URL with :443 at the end (e.g., https://storeroom-parachute.plex-cf.info:443) and click on “Save Changes”.
This instructs the Plex cloud service to relay client requests to this URL, rather than the Remote Access settings (which is completely disabled in my example). This should happen practically instantly, but you may have to restart Plex and/or re-sign in to force this change to take affect.
For some reason, the port number is required for off-LAN iOS downloading to work, and others have reported that it fixes other issues too.
![2024 ∕ 01 ∕ 07 20꞉16꞉38 - Windows_11_[Running]_-_Oracle_VM_Virtual.png](https://images.squarespace-cdn.com/content/v1/55ca1042e4b07aa63f079ba0/1704658727156-C1PIC2I2322XL2Q79PU5/2024%E2%80%89%E2%88%95%E2%80%8901%E2%80%89%E2%88%95%E2%80%8907+20%EA%9E%8916%EA%9E%8938+-+Windows_11_%5BRunning%5D_-_Oracle_VM_Virtual.png)
![2024 ∕ 01 ∕ 07 20꞉17꞉57 - Windows_11_[Running]_-_Oracle_VM_Virtual.png](https://images.squarespace-cdn.com/content/v1/55ca1042e4b07aa63f079ba0/1704658730181-4M3O0HWNBN4A53OMEYYP/2024%E2%80%89%E2%88%95%E2%80%8901%E2%80%89%E2%88%95%E2%80%8907+20%EA%9E%8917%EA%9E%8957+-+Windows_11_%5BRunning%5D_-_Oracle_VM_Virtual.png)
https://app.plex.tv/ and the apps should now be able to connect to your server via Cloudflare, which you can confirm by using your web browser’s developer tools for network (F12).
Step 8: Additional security
If you want to further increase the security of your Plex remote access, here are a few options available in the free plan, with many more available in the reasonably priced paid plans.
https://dash.cloudflare.com/ → “Domains” → your domain name → “Security” → “Security rules”:
• A rule to block access if the originating country is not an expected one.

![2024 ∕ 01 ∕ 09 12꞉38꞉19 - Windows_11_[Running]_-_Orac.png](https://images.squarespace-cdn.com/content/v1/55ca1042e4b07aa63f079ba0/1704804088460-QMHMOY4EC4MFY2RFADJ3/2024%E2%80%89%E2%88%95%E2%80%8901%E2%80%89%E2%88%95%E2%80%8909+12%EA%9E%8938%EA%9E%8919+-+Windows_11_%5BRunning%5D_-_Orac.png)
![2024 ∕ 01 ∕ 09 12꞉38꞉40 - Windows_11_[Running]_-_Orac.png](https://images.squarespace-cdn.com/content/v1/55ca1042e4b07aa63f079ba0/1704804091925-UNEA4SRYC59JALI5ERUS/2024%E2%80%89%E2%88%95%E2%80%8901%E2%80%89%E2%88%95%E2%80%8909+12%EA%9E%8938%EA%9E%8940+-+Windows_11_%5BRunning%5D_-_Orac.png)


• A rule to block known bots.
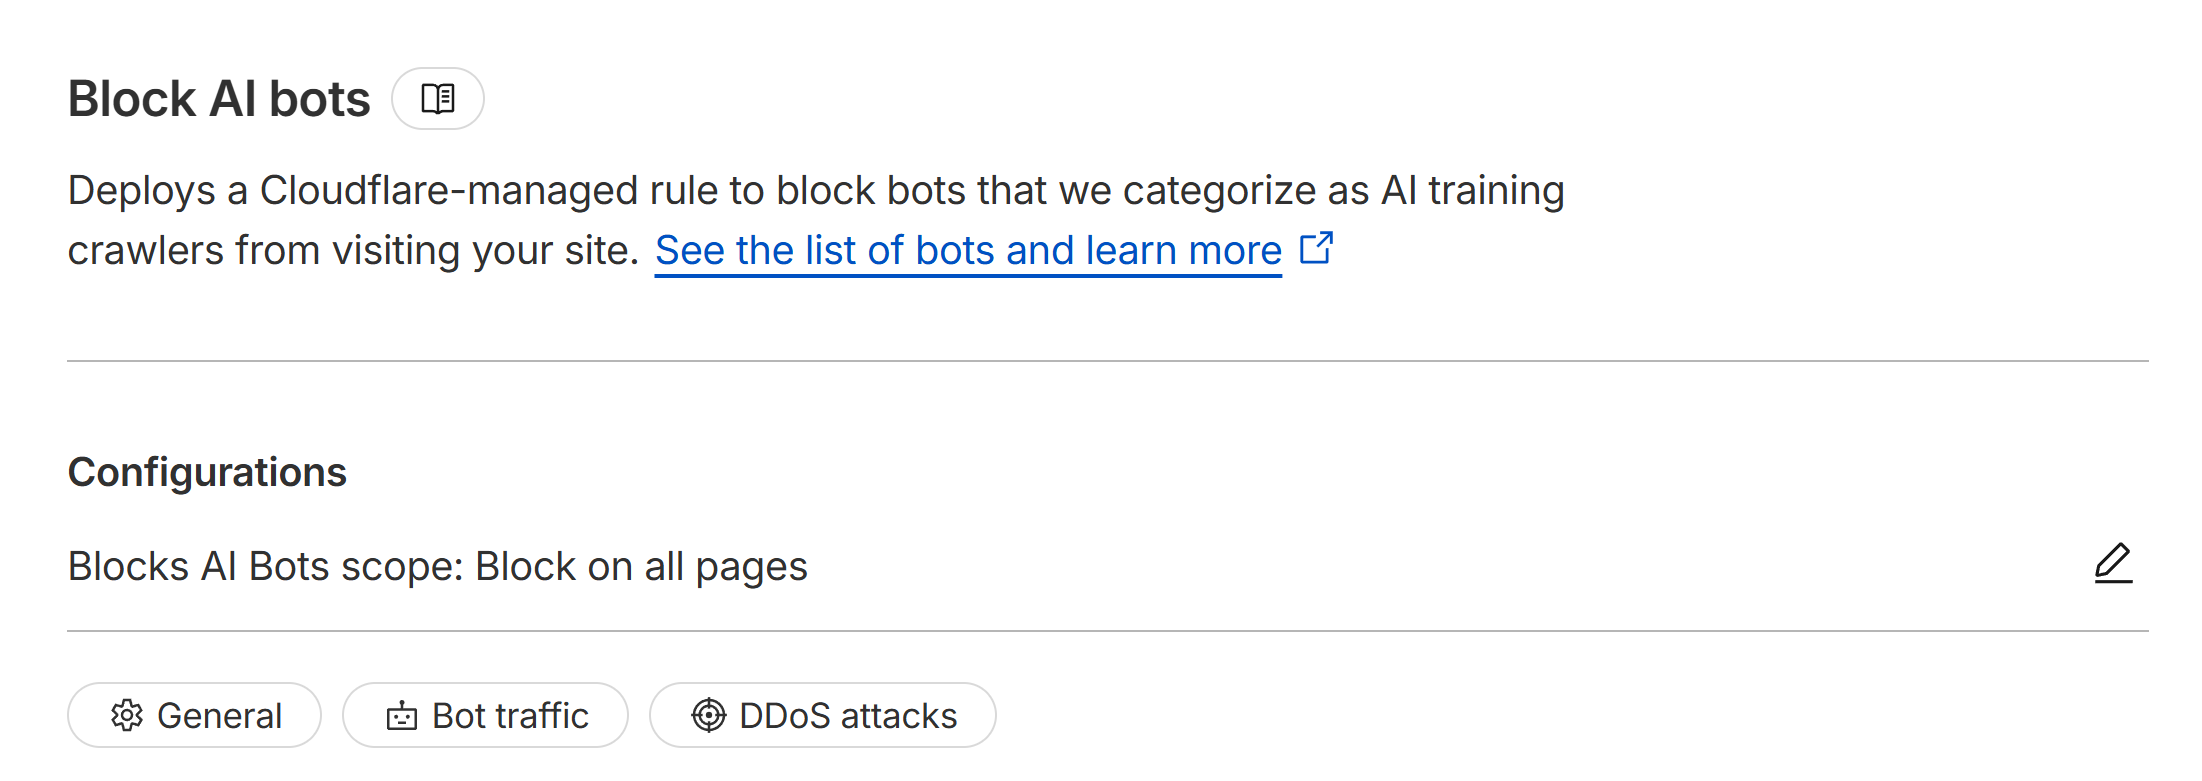
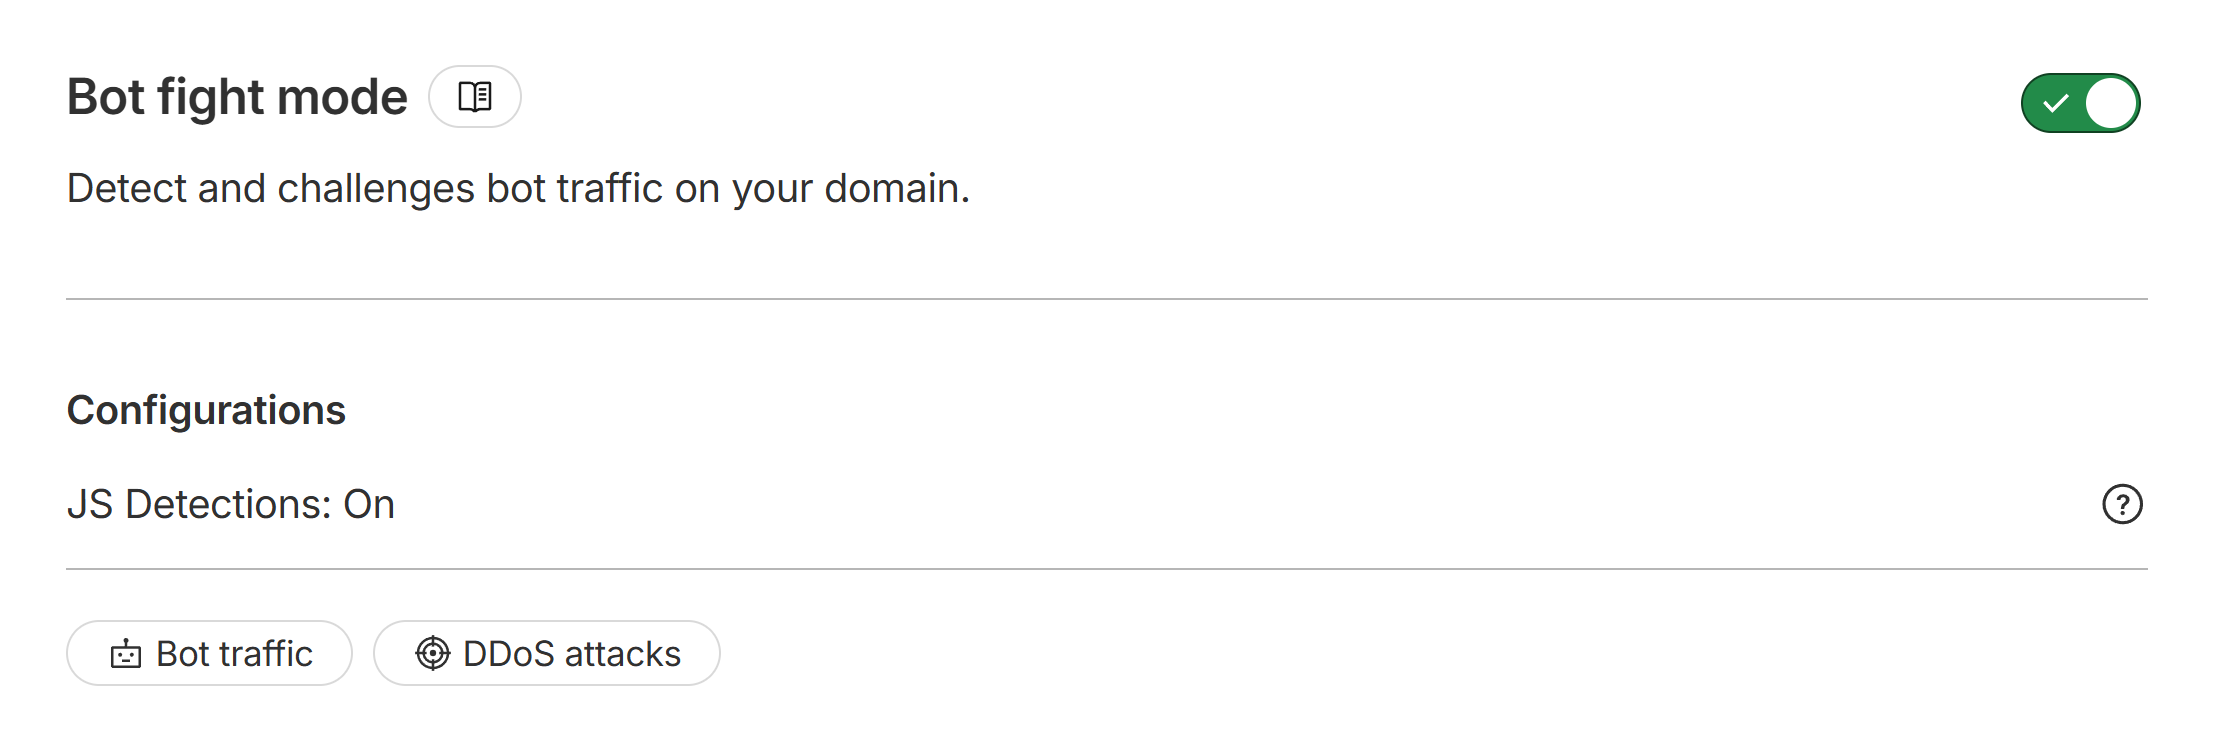
https://dash.cloudflare.com/ → “Domains” → your domain name → “Security” → “Settings”:
Set “Blocks AI Bots scope: Block on all pages”.
Enable “Bot fight mode”.
Enable “Browser Integrity Check”.
https://one.dash.cloudflare.com/ → your account → “Access controls” → “Applications”: All of these settings. Refer to https://developers.cloudflare.com/cloudflare-one/applications/configure-apps/self-hosted-apps/.
Step 9: Notifications
If you want to receive email notifications for certain events, this can be set up at https://dash.cloudflare.com/ → “Manage account” → “Notifications”.
Product “Tunnel“ → alert type “Tunnel Health Alert” is a particularly useful one.
Known issues
[Fixed] iOS downloads
There seems to be a bug in the iOS (iPhone and iPad) apps where attempting to download videos gets stuck on “Queued” when not on the same network as the media server.
Refer to:
Sign-off
As usual, I sincerely hope that this has been useful to someone.
Feel free to subscribe to my newsletter to be automatically notified of new blog posts in the future.
😊