Intro
My iCloud Photo Library is full of invaluable memories that I never want to lose - lovely family events, amazing holidays, incredible concert moments, etc. I’m sure almost everyone can relate.
But they’re already safe in iCloud, right? Not necessarily. As resilient as cloud services provider are these days, they’re not infallible, and there’s not a great deal to stop accidental or malicious deletions, especially ones you don’t notice in time. And file sharing services are not the same as proper backup services. So, it’s always good to have a backup, ideally one that’s offline so you have complete control over it.
But how do you do this on Windows? There’s surprisingly little good advice online, hence this.
Index
Overview of and links to sections:
Existing guides
If you Google “how to back up icloud photo library” or something similar, you’ll probably find this:
https://support.apple.com/en-gb/HT204055 / https://support.apple.com/en-gb/HT205323 saying to use iCloud for Windows. We’ll get to this..
https://support.apple.com/en-gb/HT208514 saying to use https://privacy.apple.com/, but:
“Request a copy of your data”. We’ll get to this too.
“Request to transfer a copy of your data” only has Google Photos as a destination which isn’t what I want for a number of reasons.

https://www.imore.com/how-to-back-up-icloud-photo-library saying to use the Photos app on macOS. Great, but I have a Windows PC.
https://www.easeus.com/computer-instruction/how-to-backup-icloud-photo-library.html saying to use the Photos app on macOS or “Download the photos from iCloud into File Explorer on your computer” (👏).
https://www.pcmag.com/how-to/back-up-sync-iphone-pics-with-icloud-photos saying to use your Apple devices, use iCloud for Windows, or view them on icloud.com..
https://apple.stackexchange.com/questions/418111/backing-up-huge-icloud-photo-library-to-external-hdd saying similar things to the above, including downloading them from icloud.com which is limited to 999 at a time.
https://www.ubackup.com/phone-backup/backup-icloud-photos-to-external-hard-drive.html saying similar to the above.
https://petapixel.com/2022/03/12/dont-use-icloud-for-long-term-photo-backup/ is practically of no use whatsoever.
Etc etc.
Bad solution: iCloud for Windows
Apple make iCloud and recommend using their iCloud for Windows app for this very purpose. Problem solved, right? Well, no. The problem is that it’s just incredibly slow. (That 2.2-star rating and all of those 1-star reviews are a bit of a spoiler.)

What do I mean by that?
Well, I’ve installed it, signed in, ticked Photos, and waited nearly 2.5 hours for the System Tray app to finish “Initialising” my 24,000+ items (a blazing ~160 items per minute) and say “Updated Just Now“. All done?


No, not by a long shot. That just downloaded the stub files - the files you open which cause the actual content to be automatically downloaded in the background, which obviously isn’t a backup. You can check this for yourself by looking at the properties of the Photos folder (“Size on disk: 0 bytes”) and the status column for each file which is all cloud symbols.
You can right-click on a file and click on “Always keep on this device” which will download the actual contents and change the status symbol to a green tick.


You can also do this for entire folders, so let’s do that for the whole of iCloud Photos\Photos. That should kick off the proper full download process, right?
Technically, yes..


But, over 24 hours hours later, it’s downloaded a grand total of… 51.2 MB, an additional 47.71 MB. (This wasn’t a one off - originally, I let it run 24/7 for over a week and it only downloaded 147 MB.)


That works out as 0.004418 Mbps. At that rate, it would take 82.63 years to download the full 1.44 TB!


Also, the fact that it’s doing a whole lot of nothing aside, why is it constantly using an entire logical processor, while barely touching the storage drives and not using the network?! That’s very strange for an app that’s meant to be rapidly downloading gigabytes and gigabytes of files. I never thought I’d be thankful for a lack of multithreading!
Even Process Monitor doesn’t really shine any light on what it’s doing. Just that it’s reading the file system up until the iCloud Photos folder every 30 seconds and repeatedly reading file %localAppData%\Packages\AppleInc.iCloud_nzyj5cx40ttqa\LocalCache\Local\Apple Inc\iCloudPhotoLibrary\client.db.
Oh, and this happened to me at least 3 separate times. And I don’t have any problems like this with any other apps that work in the same way (e.g., Dropbox and OneDrive).
/uninstall
Workable solution: Data & Privacy export
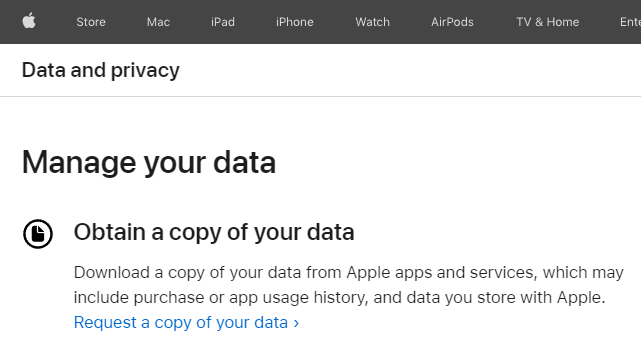
At https://privacy.apple.com/account, there’s an option to “Request a copy of your data” which you can use for iCloud Photos.


It works fairly well, but:
1. It takes up to 7 days for the download to become available. (Mine took 2 days.)
2. It “only” downloads at ~9.0 MBps / ~72 Mbps, with brief peaks to 9.4 MBps / 75.2 Mbps.
3. The downloads are split into many ~25 GB .ZIP files which are susceptible to interruption.
4. The export is almost certainly a complete snapshot (pun unintended) each time, with no easy way to perform incremental exports.
Good solution: iCloud Photos Downloader
So, what’s a good solution?
iCloud Photos Downloader - a free, open-source, third-party tool to… download iCloud photos, and it works remarkably well!
It is a Command-Line Interface (CLI) tool, so, remembering what it’s like to have never used CLIs before, I will do my best to guide you through using it. To that end, when you see something like <text>, you need to replace that whole bit with whatever is relevant to you. (Don’t be intimidated - it’s really not as difficult as it seems.)
1. Download iCloud Photos Downloader
Browse to https://github.com/icloud-photos-downloader/icloud_photos_downloader/releases and download the latest file named something like icloudpd-<version>-windows-amd64.exe. For example, icloudpd-1.12.0-windows-amd64.exe.
(This is a CLI .exe file - you cannot simply double-click on it to run it properly like with “normal” ones.)

2. Open PowerShell
CLI apps can be run in any shell. We could use Command Prompt (old), but we’re going to use PowerShell (new) for future proofing.
To open it, click on the Start Menu in the bottom left-hand corner of the screen, type / search for “powershell”, and click on “Windows PowerShell”.


3. Run iCloud Photos Downloader initially
The following will run the initial full download.
3a. Prepare your command for your environment:
Template:
& "<full path to the downloaded .EXE file>" --directory "<full path to the folder where you want to store your iCloud photos and videos>" --username <your iCloud / Apple ID username>Example:
& "C:\Users\Ben\Downloads\icloudpd-1.12.0-windows-amd64.exe" --directory "C:\Users\Ben\Pictures\iCloud Photos Backup" --username john@example.com
3b. In PowerShell, type in your command and press Enter to run it. (Screenshots are below in case you’re unsure what it’s meant to look like.)
3c. After a few seconds, it will prompt for you to enter in your iCloud / Apple ID password. Type or paste it in (you won’t see any characters appear) and press Enter.
3d. If you have Two- / Multi-Factor Authentication enabled (which I hope you do), type in the number for the option / method you want to use, press Enter, type in the code, and press Enter.
3e. The full download should have started.
Mine maxed out my Internet connection’s download speed of 300 Mbps / 37.5 MBps and completed the entire download in ~19.25 hours! And on top of that, it used more than half of the processing power while doing so!


4. Run iCloud Photos Downloader subsequently
You probably don’t want to run a full download every single time you want to back up your iCloud Photo Library, so the following will run a subsequent / incremental download from the latest backwards until it finds matching local copies.
4a. Prepare your command for your environment:
Template:
& "<full path to the downloaded .EXE file>" --directory "<full path to the folder where you want to store your iCloud photos and videos>" --username <your iCloud / Apple ID username> --until-found <number of photos in a row to consider as up to date>Example:
& "C:\Users\Ben\Downloads\icloudpd-1.12.0-windows-amd64.exe" --directory "C:\Users\Ben\Pictures\iCloud Photos Backup" --username john@example.com --until-found 20
4b. In PowerShell, type in your command and press Enter to run it.
4c. After a few seconds, it will prompt for you to enter in your iCloud / Apple ID password. Type or paste it in (you won’t see any characters appear) and press Enter.
4d. If you have Two- / Multi-Factor Authentication enabled (which I hope you do), you may need to complete this depending on when you last ran it: type in the number for the option / method you want to use, press Enter, type in the code, and press Enter.
4e. The incremental download should have started.
Sign-off
As usual, I sincerely hope that this has been useful to someone.
Feel free to subscribe to my newsletter to be automatically notified of new blog posts in the future.
😊